Last january I bought the group from Willowbog while visiting the British Shohin show and it was the tallest bonsai that I had - seemed funny at the time to look at tiny ones all day but buy a 1 meter tall one. We wrapped the pot and branches tightly in palletwrap so it could be tipped on its side in the boot of the car without all the soil falling out and home to Cornwall the tree came. The tree was a very good price in order I think to tempt someone to move it further south, away from some of the harsh late frosts that can occur further north. There were a few dead trunks in the group and a couple that were not too good but the plus points were the excelent bark colour (bright white without lime sulphar) and the fact the main tree was very strong and heathy.
The timing of getting the tree coincided with an online progression contest run by Ryuga tools so i entered the tree as it was the only unstyled material i had at the time. This is an online picture based contest with initial pictures and ongoing progression pics being submitted for judging, but during the competition you could not publicise the material where people could comment. I've now submitted the final picture so can show the tree here.
This was the tree at the start

Cleaning off all the leaves to see what was what

Next job was to cut out the dead trunks so the remaining bits could be assessed


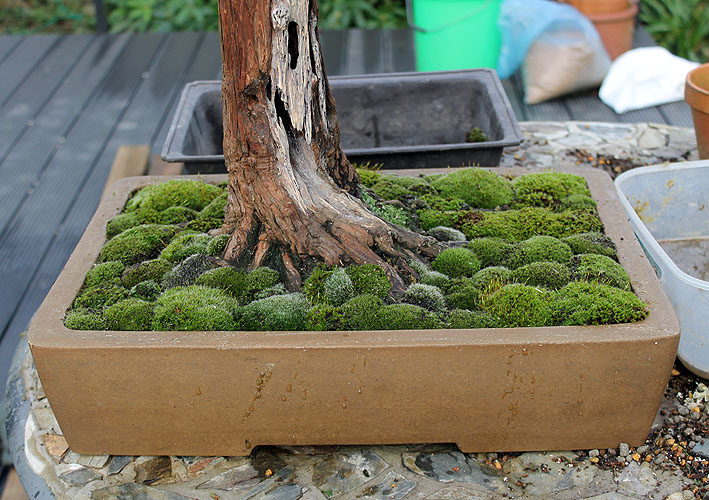
An experimental airlayer was taken from the top and some wires used to pull down the upward branches. Now it was just a case of waiting to see what leafed out......................

Mid summer and there are two weak trees at the back - both are living but only a few buds opened. Rather than spend years trying to get them up to the same vigour as the rest of the group they were removed. Also a lot of the very strong upper growth was reduced to begin adding shape and to drive strength down to the lower branches.
Early Autumn and this is what remained - the leaves are turning and the final plan is coming together

The tree was repotted into a nicer Walsall ceramics oval as no roots needed pruning and it was good to see very healthy mycorrhiza in the rootball - there had been visible mushrooms too. I wanted the two stray trunks closer to the main planting so roots were combed out so the gap could be reduced.
More of the upper branches were reduced and everything that needed it was wired. One brave move was to cut out the top of the secondary trunk - it was thicker and knobbly while getting muddled in the canopy of the prime trunk - once cut off the spaces between the branches seemed to work better. A few pictures for the Ryuga competition, a few tweaks, a few more pics and here we have a one year progression (hopefully a progression ! as there has been a lot of reduction)


I find information on Crenata quite thin on the ground so here are a few things I did, and please add any other information that may help others to the comments.
Pruning: I let the tree leaf out and the buds extend - strong buds made 6 or 7 leaves. While the tips were still soft I cut back strong shoots to 2 or 3 leaves. (this is a fairly standard native beech pruning method) In correspondance with Owen Reich he gave me a little more info......before cutting back the shoots study the leaf bases - some produce buds at the base while others do not. Once the tiny buds are visible cut back to 2 or 3 visible buds not to a number of leaves. This method is a lot safer and gives far more options as there will be back up buds on every shoot in case some refuse to open - as they do at times. This also gives choice of new branch direction when pruning as there will be different buds to pick from, and it avoids totally the scenario of cutting back a shoot to 2 leaves and neither having a bud at the base.
The tree only made one flush of growth (other than a few secondary inner leaves that opened near the trunks) so the outer thinning let light reach these weaker shoots and internal leaves, strengthening their buds for next year. This is the third crenata I've had and I find the work of this year is essential to make the buds strong for next year. If you consider the dormant cigar shaped bud formed now already has the fixed number of leaves in it for next years growth. A weak tree will have weak buds - these will have few leaves formed in them, so the chances are the tree has an even weaker year ahead. This is a key reason why so many white beeches are seen with just single pale leaves stuck on the end of bare leggy branches. You can easily assess how a tree has been doing in previous years by the appearance of the shoots - if a tree only has one or two leaves on the branch tips and has not been pruned back you know it was underfed and will not have strong buds for the next year.
Feeding and watering:
If they dry out on a hot windy day the leaf edges scorch. This is caused by a salt build up in the leaf margins rather than just the leaf actually drying so it can be reduced by using the best quality water you can - tap water in your area may be high in salts and strong chemical fertilizers can be another cause. All the time the tree is moist the leaves transpire normally and remain green, but as the pot moisture drops the flow to the leaves reduces so the leaf transpiration reduces - this concentrates the salts in the leaf margins causing the damage - it is why you never see trees in the ground with the same leaf damage.
Positioning and soil make up can help a lot - i use a fair bit of akadama and kanuma as they hold moisture, plus the tree sits with the maples rather than the pines. This kept the leaves reasonable for most of the summer but I had been feeding very hard so a tiny bit iof scorching had occured by autumn.
Leaf colour:
the leaves are the perfect indicator of pot and soil conditions - yellow leaves or green veins with yellow margins show deficiencies, and these are not always just nitrogen. These beeches seem to need higher PK levels than many other trees so I supplement the organic slow release feed with a Canna PK additive. 2012 was incredibly wet and so much nutrition was washed through the soil - also it was a hard year to get organic feeds working properly as they need warm temperatures to break down properly and supply the tree with usable nutrition. Looking at the pictures I managed to keep the yellow leaves at bay until Autumn with constant feeding, then they went yellow as nature intended.
 I'm happy with the 12 months